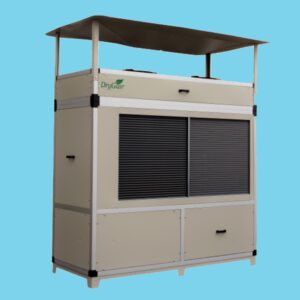
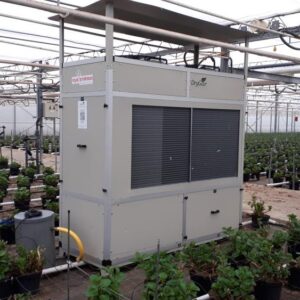
DryGair DG-12 standard unit: How to install?
A Drygair unit helps you dehumidify greenhouse air in an efficient and simple way. As a result, the humidity and temperature is more stable.
Below is a step by step explanation of how to set up your DryGair DG-12 standard unit.
- Make sure you read the operation manual and note the safety warnings before you begin.
- The first thing we’ll need to do, is to remove the braces that lock the compressor thing.
- There are 4 bolts holding down the compressor, 2 in the front and 2 in the back.
- Unscrew each bolt slightly, just until you can remove the brace surrounding the spring.
- Make sure you remove all 4 braces before continuing.
- This will allow the springs to soften the vibrations of the compressor.
- This is the electrical compartment. This is the main switch, used to power unit on and off.
- This is the Mode selection switch labeled SW1
- Right here are indication lights. The green light is the run indication, and the red light is the fault indication.
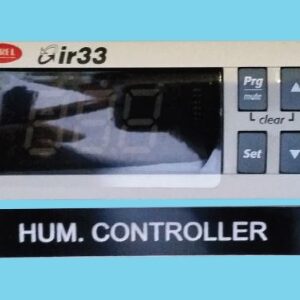
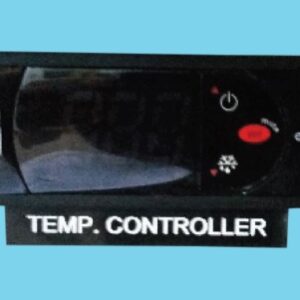
- Up at the top is the thermostat on the left, it comes preset by the manufacturer and shouldn’t be adjusted.
- And the humidistat on the right confirm the DryGair unit is stable and levelled before you begin working.
- Warning: only a certified electrician is authorized to connect the unit to the grid.
- Before hooking up the unit to the main power supply, verify that the external circuit breaker is turned OFF.
- Begin by opening the electrical compartment door.
- Identify the grid connection terminal on the bottom row of the electric compartment.
- The supply wires should have a surface area of 10 square millimeters or 8 AWG.
- Before connecting the wires, make sure that the main switch is in the OFF position.
- For units using 60 HZ frequency, or the American standard.
- Connect the wires from the main power cable to L1, L2, L3 and Grnd. When you’re finished, it should look like this.
- For units using 50HZ frequency, or the European standard, the connection includes and additional neutral wire, and should look like this when you’re finished.
- Now we are ready to power on. First, toggle the external circuit breaker to its ON position.
- Now, toggle the unit main switch ON. You will see the display on the thermostat and humidistat light up.
- During the first operation of the unit, you need to wait at least 2 hours between powering on before continuing to the operation stage.
- While you’re waiting, you can go ahead and install the canopy. Make sure it is secure and stable.
- The next step is to connect the water drain pipe to the unit.
- First remove the rear cover from the unit.
- Connect the prepared drain pipe with a siphon to the threaded 1,5 inch BSP bushing drain outlet.
- You can route the drainage tube out through the bottom from the floor beneath the unit.
- You also have the option of routing the drainage pipe out of the side cover or rear cover of the unit. You will find a premade circular cut-out on these covers. That can be removed simply with the use of a screwdriver and hammer.
- Now, we will set the desired relative humidity percentage, or set point, into the humidistat.
- If you look at the display, you will see that the humidistat on the right shows the current relative humidity level that the sensor reads in the room.
- To set the required Humidity percentage, press the set button once. The screen displays: ST 1.
- Once you release the set button, the default humidity set point will flash on the screen. Right now, the set point is 30%.
- Using the up/down arrow buttons, set the value to the required humidity percentage. Right now, the humidity set point Yair is 70%.
- Press the set button again to save the change. The current relative humidity level that the sensor reads will be displayed on the screen.
- 2 hours have passed since we first powered on. Now we can go ahead and operate the unit.
- The unit mode selection switch has three operating modes. When set to 0, the unit is off. When set to 1, the unit is in local mode and operates according to the setpoint you dictated into the unit’s Humidistat.
- When the unit is set to 2. It is in remote mode, and is operated and controlled by the climate control system.
- If you choose to work using the remote operating mode, call your climate control expert for assistance in setting up the connection.
- When operating the unit remotely, the unit will work based on the set point dictated by the climate control system.
- You should use 24V AC cables, to connect to the relays at the bottom right corner of the electrical compartment, labeled 40-45.
- These relays, 40 and 41, provide the system with a remote start and stop command.
- These relays, 42 and 43, will allow the system to send a remote drying command.
- These relays 44 and 45 are responsible for sending a fault indication to the climate control system. In case of malfunction, we will turn the unit on in local mode.
- The green run light should be on, and the red fault light should be off.
- If the red fault light is on, consult the operation manuals troubleshooting section.
- You will notice that the fans have begun to work.
- To check that the fans are working properly, you can do a simple test. Take a sheet of paper, and bring it towards the coils on the outside of the machine.
- If the paper get sucked towards the coils, it means that the fan is operating properly.
- Repeat this test for both fans. If one or more of the fans is not working properly, consult the operation manual.
- Verify that the air exiting the units is distributed above the plants and not straight at them. 4
- If the relative humidity level is higher than the set point, meaning that the unit needs to dehumidify to the desired level, the compressor should begin to work around 3 minutes after the machine had been turned on.
- You will be able to hear it running. When these 2 orange lights are on, it means that the unit is currently dehumidifying.
- Lastly, wait 30 minutes after operating the unit, and check to verify that the coils are fully wet, and that water is flowing out of the drainage pipe.
- Congratulations! This means that DryGair is effectively dehumidifying. Thanks for your attention. We wish you successful growing and dehumidification with you DryGair system!
Do you want more information about DryGair DG-12 or do you have questions about how to install the DryGair DG-12? Ask them using the form below.
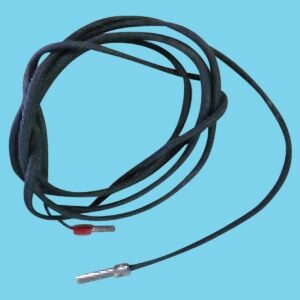
Hortispares provides you with all the horticultural spare parts your need, also for a sensor. Easily find the right spare parts through exploded views!


